Quick: Search → Open → Edit → Publish
How to Search & Edit Records in ArchivesSpace — Student Guide
How things flow (big picture)
The Center’s Archive is structured into pre-selected categories or series: Governance and Administration, Congregation History and Identity, Membership and Sisters' Records, Ministry and Apostolic Works, Properties and Facilities, Financial and Development Records, Communications and Publications, Digital Assets and Info System, and Visual Materials and Artwork. Within each series, materials are further divided into sub-subseries, then organized chronologically, and ultimately alphabetically.
Search
Start at the ArchivesSpace Staff search box. Use keywords, names, or stable IDs (fastest).
Open & Read
Open the record (Resource / Archival Object / Digital Object). Read title, dates, extent, notes, and linked agents/subjects.
Edit (if allowed)
Click Edit. Make precise changes: fix typos, add dates, update file versions. Save. Publish only with approval.
QA & Publish
Check public view after publishing. For bulk imports check job logs and fix errors before retrying.
HARC_001_1_2), paste it directly into the search box — it often returns the exact item.Part A — Searching (simple)
- Sign into your institution’s ArchivesSpace Staff interface.
- Type a keyword, name, or ID into the top search box.
- Use filters to narrow by record type, repository, or date.
- Click the result title to open the full record.
➤ Example — find an archival object quickly (▶ click to expand)
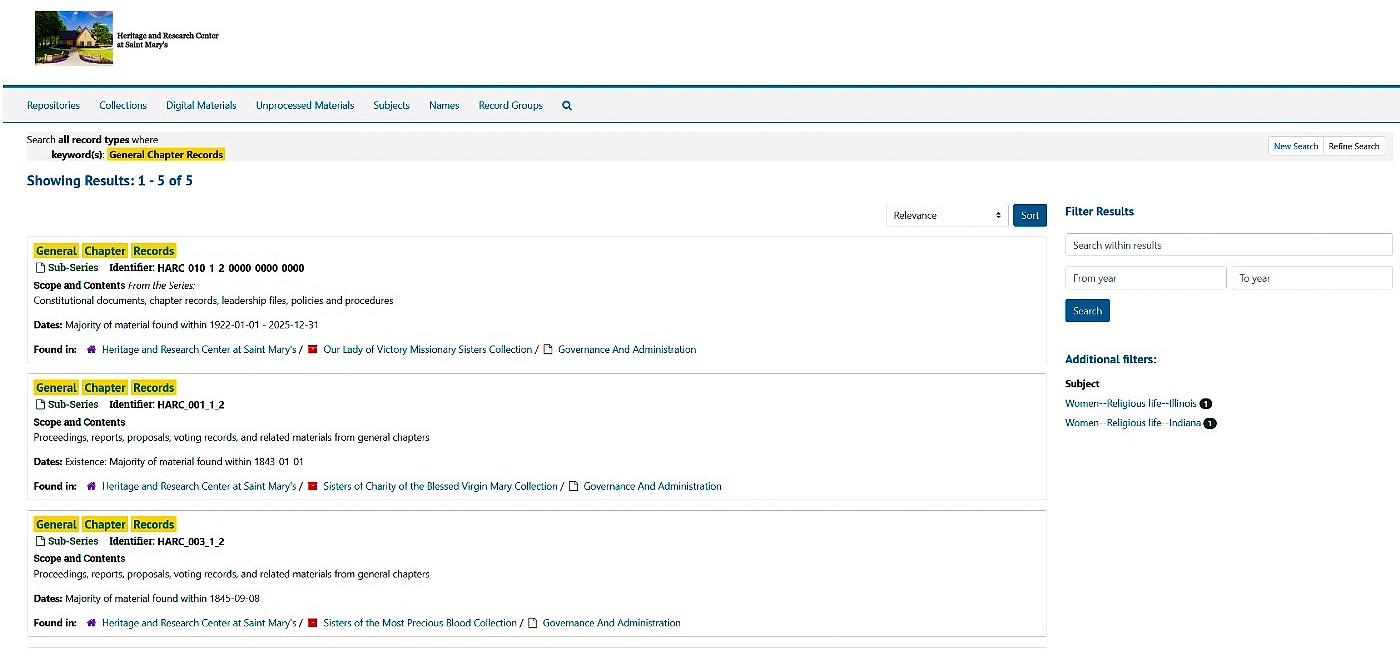
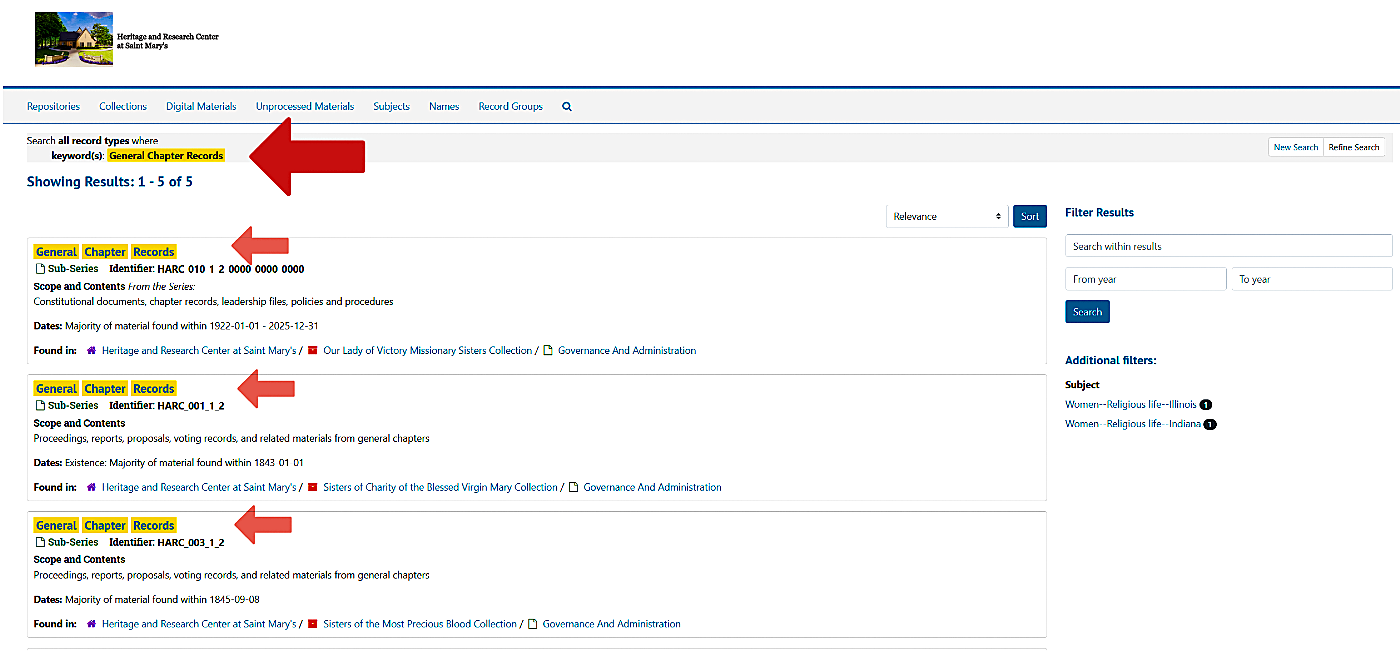
- Search for
General Chapter Records - From results, choose a Resource or Digital Object entry.
- Open the record and check file versions for a representative public file.
Part B — Reading & Understanding a Record
When a record opens, scan these sections in order:
- Header / identifiers — repository, resource
- Title & Dates — accuracy matters
- Extent / Container or File Versions for digital
- Notes — Scope & Contents, Biographical/Historical
- Agents & Subjects — linked, controlled vocabularies
➤ Example - (▶ click to expand)
Part C — Editing Records (step-by-step)
- Open record → click Edit (top-right).
- Make small, precise changes:
- Fix typos in Title or Scope & Contents.
- Add or correct dates (use
YYYY-MM-DDwhere possible). - Update file versions for digital objects (preservation vs public access).
- Save your change. If your site uses a Publish control, publish only if you are authorized.
- Confirm in public UI (open public view) to verify representative image and downloads.
➤ Quick editing rules for students - (▶ click to expand)
- Don’t change stable identifiers unless instructed by staff.
- Use the controlled-vocabulary suggestions when adding Agents/Subjects (type then pick the suggestion).
- Record an edit note (who/what/why) in the change log area when you save.
.jpeg)
Part D — Bulk uploads & jobs (brief)
Use the archivesspace_bulkupload.xlsx file for all bulk uploads or bulk edits:
- Test with a small batch first (3–5 rows).
- Run the job → check the job log for warnings/errors.
- Fix problems in the source sheet and re-run.
- If duplicate IDs appear, increment the suffix (
_0002,_0003).
Quick practice exercise
- Search for
General Chapter Records - Open a matching Resource
- Click Edit → update the Scope and Contents note
- Save (and note your edits in the edit log). Verify the public view.
Resources & cheat-sheet
- ArchivesSpace documentation
- Local staff policy: when to publish vs when to leave as unpublished.
- CSV template for bulk upload